---
updatedAt: 2026-07-30T09:58:39.000Z
---
Fetch the complete documentation index at: https://apidocs.eightfold.ai/llms.txt. Use this file to discover all available pages before exploring further.
# OAuth Configuration
How to enable OAuth for an API server
## Purpose
This tutorial introduces users to the Eightfold (EF) OAuth Authentication, including a general overview of Oauth server basics, information about types of Oauth flows, the Eightfold OAuth 2.0 process flow and will answer certain frequently asked questions about OAuth 2.0.
## Audience
This document is created considering its use for solution architects, customers, and implementation partners.
## Process Flow
Here is the process flow that is followed for Eightfold Oauth2.0 authentication:
* Connect with auth server to validate the credentials
* Acquire the token once the authorization prompt is visible and app request is approved
* Use the token to access the resource server and access the data
## Configuring OAuth
To configure OAuth, a user will have to follow two major steps. The first is to get the server credentials, the second is to use these credentials to get OAuth token, and the third is to use the token to validate your API calls.
## Step 1 : Getting server credentials
There are two ways one can fetch server credentials, one by using the username and password, and other using the client credentials.
One can fetch the API Basic credentials and use the email as the *user\_id* and the *api key* as the password to fetch the token from the authentication token endpoint. This can be found on the Admin Console. Here is the path for the same:
> Integration > Eightfold API > Authentication > Generate API Key
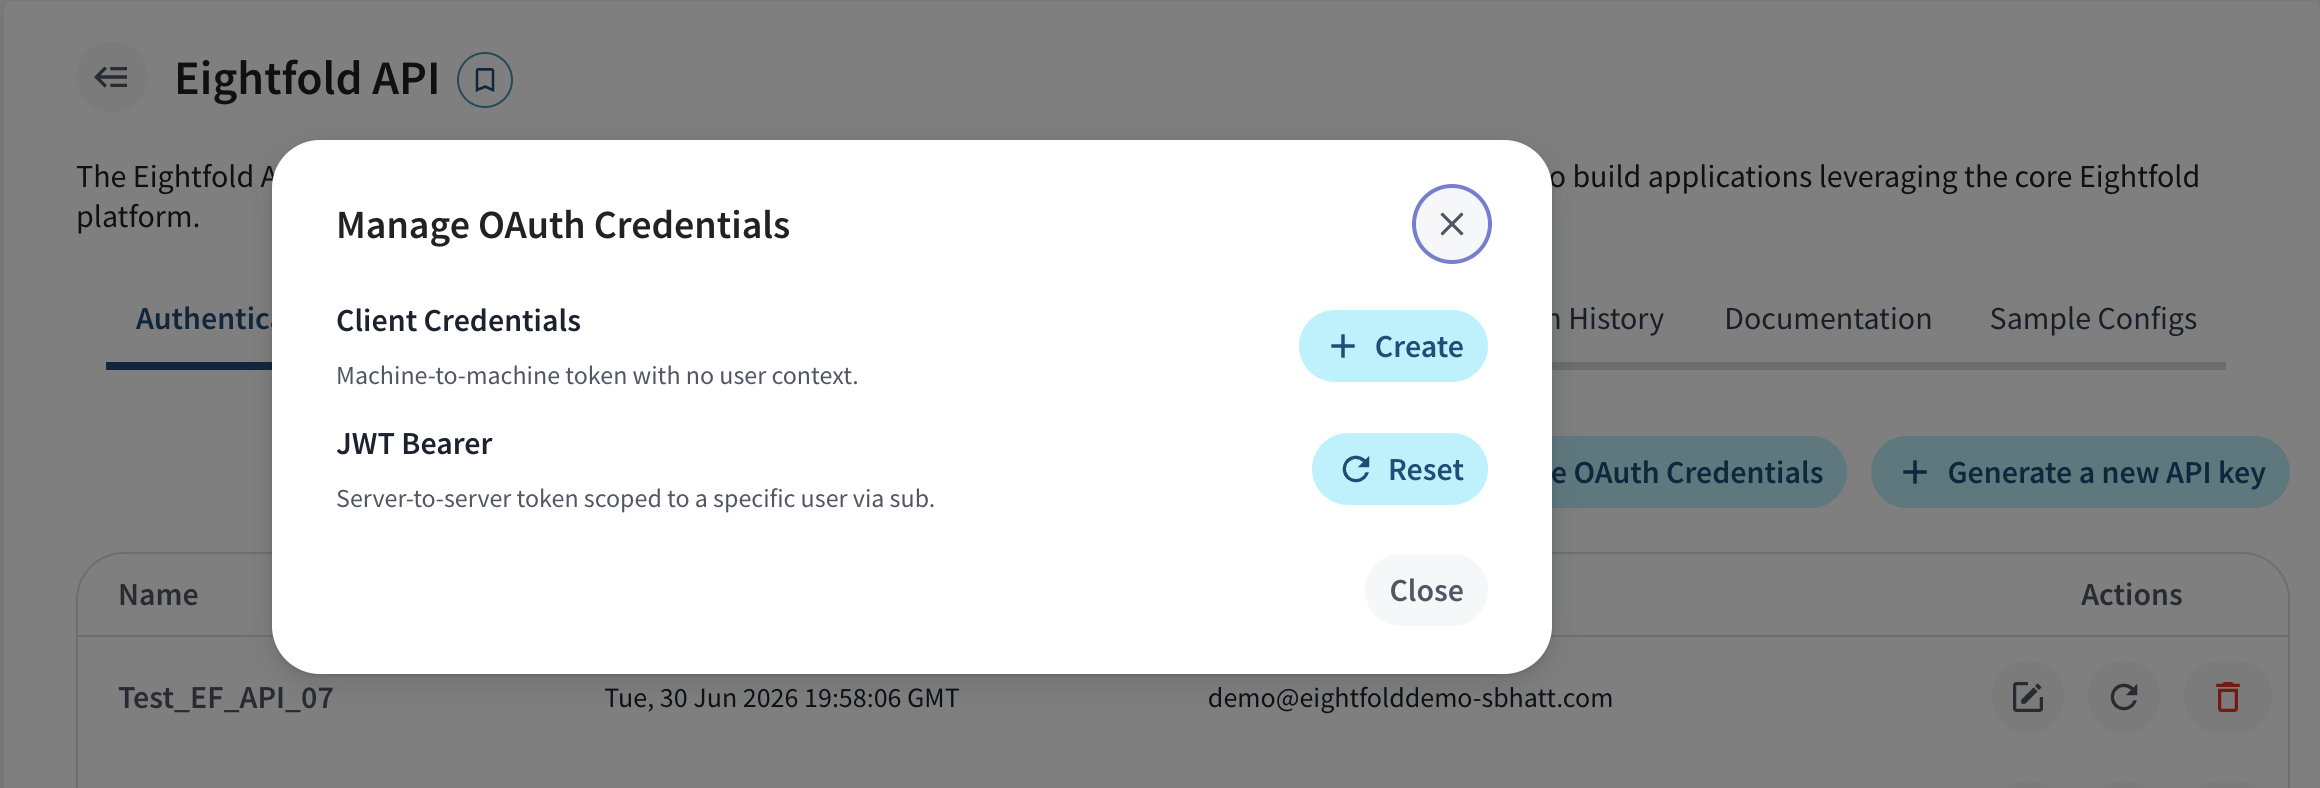
To fetch the client credentials based bearer token, one can go to Manage OAuth Credentials Section. Here is the path for the same:
> Integration > Eightfold API > Authentication > Manage OAuth Credentials
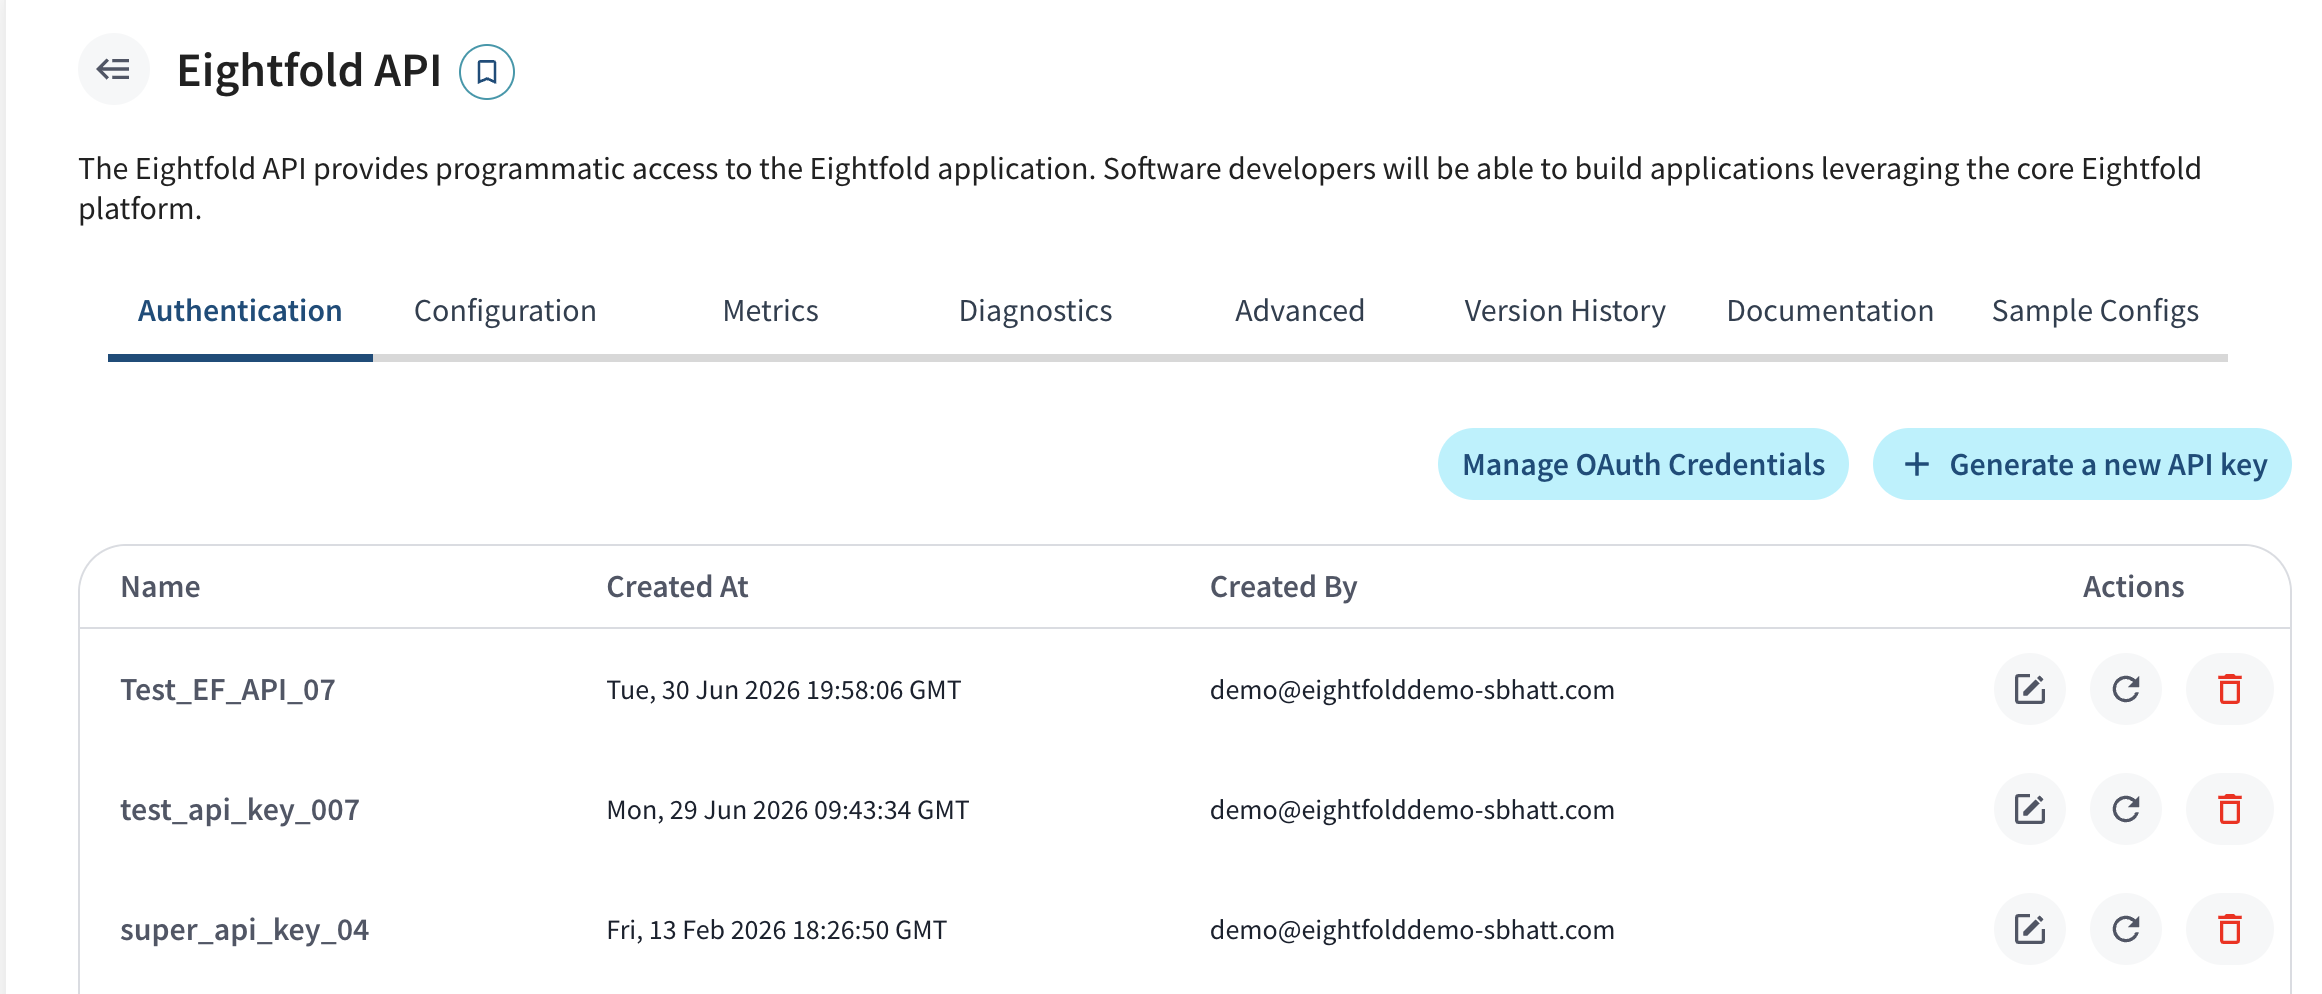
This opens a dialog box, which shows option to Create Client Credentials. One can use this to create credentials or Reset them once it has been created. For more details on this, check the associated section below.
## Step 2 : Fetching the OAuth token
Use the credentials that you fetched from the Admin Console and pass it in the payload of the Authentication fetch token call.
For sending the authentication request, hit this URL.
****
These calls are secured behind basic authentication. For using the token, add it to the header.
Please refer to the notes below for the regional domain list.
**Authorization header: US Region**
Authorization: `Basic MU92YTg4T1JyMlFBVktEZG8wc1dycTdEOnBOY1NoMno1RlFBMTZ6V2QwN3cyeUFvc3QwTU05MmZmaXFFRDM4ZzJ4SFVyMGRDaw==`
**Authorization header: EU Region**
Authorization: `Basic Vmd6RlF4YklLUnI2d0tNZWRpdVZTOFhJOmdiM1pjYzUyUzNIRmhsNzd5c2VmNTgyOG5jVk05djl1dGVtQ2tmNVEyMnRpV1VJVQ==`
**Authorization header: Govt Accounts**
Authorization: `Basic UnRRM2NPa1doMlVtVHBHSFlobnl6YnhSOjU1UXcxYXZKclI3VjNRdUMxN2VwSWFadDFEd2hmaG5xempieFE4QlVRMUtFZzFzRg==`
**Authorization header: CA Region**
Authorization: `Basic Q3hTYzBvaVZuZ2llOFdQMXRsdkxSMlg3OlBJTjVndmRaUVRvc0p3d2Q4SFE1djJMcWNCbVR1d0kybmU5SEU2bFJLT0hLaVNGUw==`
**Authorization header: ME Region**
Authorization: `Basic NHhsY3BWaVRxa2dPMEd6NENCZXFjb3ZWOkI4MEVGT0J3NGx3M0lGbWd2ZUtzU0tMMTZvQ2IxaUM5dUhkcTFEQjVqZ3cwdzZ2Sg==`
**Authorization header: WU Region**
Authorization `Basic YVRmRzdwVkJKRUVzTGZBY2dITENHUFdLOmMzbkRaM3czRGNmcExLUko5c0JmUFJUME1WSGxqVU1wbTNsRHBwUUU1YVVRYmc3Mw==`
**Authorization header: AP Region**
Authorization `Basic WlRqUzdKOHJhVkNlRnV4WE5vUllqOFo4OkhUbmJjc2hrNnJuZ05OMkxpaERVT1VVV0Z4WFZyc0owaDVpcXVYUHBQT2twQU14Vg==`
**Request type**: Post
**Payload Type:** application/json
```text Request Payload Example
{
"grantType": "password",
"username": "demo@eightfolddemo-readMe.com",
"password": "afpstqpcfgbreylauixrdftyvequyadp"
}
```
```text Sample Response
{
"data": {
"access_token": "4YIaOAkSKDPe3ImZDFy6GGxwqsYX0ynpkBZVuHJINm",
"expires_in": 864000,
"scope": "global",
"token_type": "Bearer"
}
}
```
### Regional Eightfold API Domain list
1. apiv2.eightfold.ai - For US
2. apiv2.eightfold-eu.ai - For EU
3. apiv2.eightfold-gov.ai - For US government
4. apiv2.eightfold-ca.ai - For Canada
5. apiv2.eightfold-me.ai - For UAE
6. apiv2.eightfold-wu.ai - For US (Azure Cloud)
7. apiv2.eightfold-ap.ai - For AP
Here are the query parameters explained:
| Request Parameters | Description |
| :----------------- | :--------------------------------------------------------- |
| grantType | This tells the way the application gets an access token |
| username | The credentials of the user |
| password | The password available after generating the password grant |
| Response Parameters | Description |
| :------------------ | :---------------------------------------------------------------------------------------------------------------------------------------------------------------------------- |
| access\_token | The authorization required by the application to make API requests on behalf of the user |
| expires\_in | The lifetime of the access token set by the user |
| scope | One or more space-separated strings that indicates the permissions requested by the application. The specific OAuth API you’re using will define the scopes that it supports. |
| token\_type | The type of access token used to make an API call |
## Sample Postman Call
Here is a sample request to help understand better:
```text Sample Postman Call
curl --location --request POST 'https://apiv2.domain.ai/oauth/v1/authenticate' \
--header 'Authorization: {auth for given region}' \
--header 'Content-Type: application/json' \
--data-raw '{
"grantType": "password",
"username": "{from admin console}",
"password": {from admin console}
}'
```
### Note:
The 'domain' under the authorization header will be as per the regional domain list. The user name and password will be from the admin console (Admin Console>Eightfold API>Authentication>OAuth 2.0
## Client Credentials Grant (Machine-to-Machine)
Besides Password Grant, Eightfold also supports the **Client Credentials Grant** for server-to-server integrations that don't act on behalf of a specific user — for example, an automated system or partner integration calling Eightfold APIs directly. Instead of a user's email/API key, this flow authenticates with a `client_id` and `client_secret` issued for your tenant.
The token endpoint and regional Authorization header requirements are the same as Password Grant above — only the JSON payload differs:
```text Request Payload Example
{
"grantType": "client_credentials",
"client_id": "{your client_id}",
"client_secret": "{your client_secret}"
}
```
The response is in the same shape as the Password Grant response (`access_token`, `expires_in`, `scope`, `token_type`), and the resulting Bearer token is used exactly the same way — see **Step 3** below.
### Note:
Client Credentials Grant must be enabled for your tenant, and a `client_id`/`client_secret` pair provisioned, before it can be used. Contact your Eightfold representative to get set up.
### Note:
As with Password Grant, no refresh token is issued for Client Credentials Grant either — request a new token with your `client_id`/`client_secret` once the current one expires.
## Step 3 : Using OAuth token
Once the authentication token is received, the user can this token to the authorization header to authenticate all API calls.
```text Fetch request
“Authorization”: “Bearer 4YIaOAkSKDPe3ImZDFy6GGxwqsYX0ynpkBZVuHJINm”
```
### Note:
Once the authentication token expires, the user will get a 403, urging them to request for a new authentication token before continuing.
## OAuth Configuration FAQs
Here are a few things you may want to know about OAuth Configuration:
## 1. What is the lifespan of a given token?
Currently it is 864000 seconds.
## 2. What should I do when the token expires?
Fetch a fresh token using the Authentication process as described in the process flow section.
## 3. Why don’t I see refresh tokens in the response?
Currently we only support password grant based authorization. OAuth 2.0 specifications do not support refresh tokens for password grant.
## 4. Can multiple authorization tokens be valid at the same time?
Yes. Until the token has expired or is invalidated due to password changes or explicit invalidation of the token using an endpoint.